Shop award-winning nail products




Builder Gel Do's & Don'ts - Tips To Perfect Your Nails

Getting a smooth, long-lasting Builder Gel manicure starts with good preparation, careful application and correct curing. Whether you're using Builder Gel for the first time or trying to solve problems such as lifting, peeling or uneven nails, a few important techniques can make a real difference.
In this guide, we'll explain the essential Builder Gel do's and don'ts, show you how to avoid common application mistakes and help you understand what to check when your manicure isn't lasting as expected.
These tips focus on the 14 Day Mani HEMA-Free Builder Gel system. Always follow the instructions for the particular products and compatible lamp you're using.
Builder Gel Do's: How to Get Better Results
Builder Gel adds structure and reinforcement to natural nails during wear. However, successful application depends on more than simply applying the product. Nail preparation, product placement, curing and finishing all contribute to the result.

1. Do Prepare Your Natural Nails Carefully
Good preparation helps Builder Gel adhere to the nail surface and reduces the likelihood of premature lifting.
Before applying Builder Gel:
- Remove existing nail product using the appropriate removal method.
- Gently push back the cuticles without damaging the surrounding skin.
- Follow the product instructions for light surface preparation, avoiding aggressive buffing.
- Remove filing dust and surface residue.
- Ensure nails are clean and dry before applying primer.
Preparation should never involve excessive filing of the natural nail. Removing too many layers can leave nails thin, weak and sensitive.

2. Do Use the Correct Primer
Primer helps prepare the nail surface for better product adhesion. For the 14 Day Mani Builder Gel system, use the recommended Perfect Prep Primer according to the current instructions.
Apply the appropriate amount, keep it away from the skin and allow it to dry as directed before proceeding.
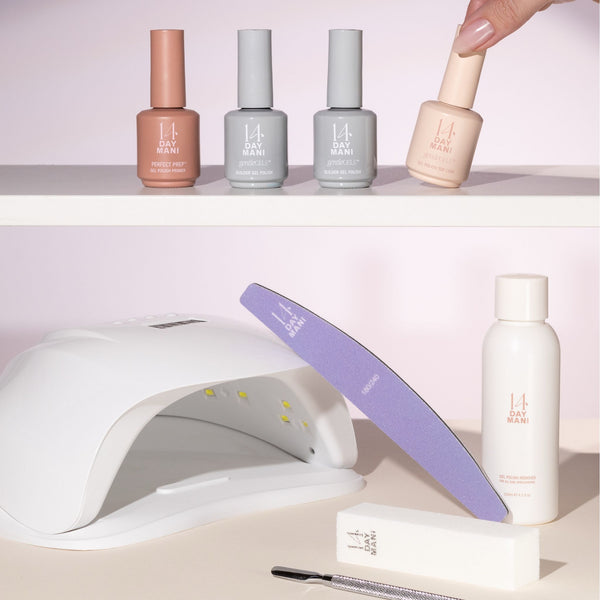
You can explore the Perfect Prep Primer and Builder Gel Duo if you're looking for products designed to work together.

3. Do Apply a Thin Slip Layer
A slip layer is a thin coating of Builder Gel that helps the next application of product move smoothly across the nail.
With the 14 Day Mani Builder Gel technique, the slip layer is left uncured while the additional Builder Gel is placed and shaped. This allows the gel to self-level and helps create an even surface.
Follow the exact procedure shown in the current application tutorial, as techniques can differ between Builder Gel systems.
4. Do Build Structure Rather Than Excessive Thickness
One of the most important parts of applying Builder Gel is creating the correct shape.
Builder Gel is designed to reinforce the nail by forming a supportive structure. Depending on the nail's length and shape, this may involve creating a gentle apex to help distribute everyday stress.
A thick, bulky application isn't necessarily stronger. Too much product can make shaping difficult and may interfere with correct curing.
Work carefully, follow the recommended application technique and keep uncured product away from the surrounding skin.

5. Do Cure Every Layer Correctly
Correct curing is essential for both product performance and safe use.
Use the UV/LED lamp recommended for your Builder Gel system and follow the stated curing instructions. Lamp compatibility, formula and application thickness can all affect curing.
Do not assume that applying thicker layers and curing for longer will produce the same result as following the manufacturer's recommended method.
If the gel remains unusually soft, does not cure as expected or behaves differently from normal, stop and check the product instructions and lamp compatibility before continuing.
6. Do Refine the Shape and Finish
Once the Builder Gel has been cured according to the product instructions, check the finished structure and shape.
If the system calls for refinement, use an appropriate file to smooth uneven areas without unnecessarily filing the natural nail.
Finish with the specified compatible top coat and cure according to the manufacturer's instructions.
Watch: How to Apply Gentle Gels Builder Gel
If you prefer watching a demonstration, this 14 Day Mani tutorial shows the Builder Gel application process, including product placement and creating structure.
Follow the current instructions provided with your products and compatible lamp. The demonstration supports the written guidance rather than replacing product-specific safety instructions.
Builder Gel Don'ts: Common Mistakes to Avoid
1. Don't Over-File Your Natural Nails
Excessive buffing and filing can remove layers of the natural nail plate, leaving nails weaker and more vulnerable to splitting.
Only prepare the nail surface as directed. More filing does not automatically mean better adhesion.
2. Don't Let Uncured Builder Gel Touch Your Skin
Keep uncured gel on the nail plate and away from the cuticles and surrounding skin.
Skin exposure to uncured gel ingredients can increase the risk of irritation or allergic sensitisation. HEMA-free products can still contain other ingredients capable of causing reactions.
If you experience a suspected reaction, stop using the product and seek appropriate professional advice.
3. Don't Apply Excessively Thick Layers
Applying too much Builder Gel in one area can cause an uneven appearance and may affect correct curing.
Instead of relying on thickness alone, follow the recommended technique for building a balanced structure.
4. Don't Skip or Shorten Curing
Do not reduce curing times to speed up your manicure or use an unverified lamp simply because it appears powerful enough.
A lamp's wattage alone does not establish compatibility with a particular gel formula. Use the manufacturer-recommended system.
5. Don't Ignore Lifting or Cracking
If Builder Gel starts lifting, cracking or separating from the nail, don't simply cover the problem with more gel.
Lifting can create gaps where moisture and debris collect. Assess the affected nail and follow the recommended removal or professional maintenance procedure.
Never peel or force off lifted Builder Gel, as this can damage the natural nail underneath.
6. Don't Apply Builder Gel Over Unhealthy Nails
Builder Gel provides reinforcement while worn, but it does not repair damaged natural nails.
If your nails are painful, inflamed, lifting away from the nail bed or significantly damaged, avoid applying another coating until the underlying issue has been assessed.
For more information, read our guide to thin nails after gel removal.
Builder Gel Troubleshooting: Why Isn't My Manicure Lasting?
If your Builder Gel manicure isn't behaving as expected, the following guide highlights possible causes and sensible next steps.
| Problem | Possible Causes | What to Check |
|---|---|---|
| Builder Gel lifting near the cuticle | Surface residue, skin contact, product placement or incompatible preparation products | Review nail preparation, primer instructions and application technique |
| Peeling or early separation | Adhesion problems, insufficient curing or product compatibility | Check the complete product system, lamp and curing instructions |
| Uneven or lumpy surface | Excessive product, uneven placement or difficulty controlling the gel | Use controlled placement and the recommended self-levelling technique |
| Cracking or breakage | Incorrect structure, nail length, physical stress or product application issues | Review nail structure and suitability; seek professional guidance if cracking continues |
| Gel remains unusually soft | Possible incomplete curing, incorrect lamp or excessive product thickness | Stop using the affected application and verify the exact curing and product requirements |
| Premature tip wear | Daily wear, application technique or an unsuitable finish | Check the recommended finishing method and avoid using nails as tools |
These are possible explanations rather than a diagnosis. Repeated problems may require a qualified nail professional to assess the products, application and nail condition.
Why Does Builder Gel Lift?
Builder Gel lifting occurs when the coating separates from the natural nail. This can happen for several reasons, and it isn't always the customer's fault.
Possible contributing factors include:
- Incorrect nail preparation or remaining surface residue.
- Uncured product contacting the surrounding skin.
- Incompatible or incorrectly applied primer.
- Incorrect lamp or curing procedure.
- Application structure that doesn't suit the nail.
- Changes in natural nail condition or everyday physical stress.
If lifting happens repeatedly, assess the complete application system rather than automatically adding more primer or filing the natural nail more aggressively.
How Long Should Builder Gel Last?
Builder Gel is designed for durable wear, but results vary depending on the product, preparation, nail condition, application and everyday activities.
14 Day Mani's Builder Gel range is intended for long-lasting manicures. For specific wear expectations and maintenance intervals, follow the current guidance supplied with the product.
A manicure should not be kept on simply because it remains attached. Lifting, cracking, discomfort or excessive nail growth may indicate that attention or removal is needed.
How to Care for Your Builder Gel Manicure
Once your manicure is complete, simple aftercare habits can help protect its appearance.
- Apply cuticle oil and hand cream regularly to help maintain skin and nail hydration.
- Wear protective gloves when cleaning or using strong household detergents.
- Avoid using your nails to open packaging or scrape surfaces.
- Do not pick or peel at any lifted product.
- Follow the recommended maintenance and removal guidance.

Frequently Asked Questions About Builder Gel
Why does my Builder Gel keep lifting?
Repeated lifting can be related to preparation, product touching the skin, incompatible products, curing problems or the condition of the natural nail. Check the entire application process rather than assuming one cause.
Do I need primer before Builder Gel?
For the 14 Day Mani Builder Gel system, Perfect Prep Primer is part of the recommended preparation routine. Follow the specific primer instructions rather than applying extra product unnecessarily.
Should Builder Gel be applied in one thick layer?
No. Follow the manufacturer's recommended slip-layer and shaping technique. Correct structure and controlled product placement are more important than excessive thickness.
How long should I cure Builder Gel?
Use the curing time and compatible UV/LED lamp specified for your particular Builder Gel system. Do not assume that all Builder Gels or lamps require the same curing time.
Why is my Builder Gel uneven?
Uneven results can come from product placement, excessive thickness or difficulty controlling the gel before curing. Practising the correct slip-layer and self-levelling technique can help improve the finish.
Can Builder Gel help natural nails grow longer?
Builder Gel doesn't speed up nail growth. Its protective structure may help reduce breakage during wear, making it easier to retain natural nail length.
Is Builder Gel suitable for beginners?
Some Builder Gel systems are designed for home use, including 14 Day Mani's range. However, creating the correct structure takes practice. Beginners should follow the product instructions and watch the application demonstration before starting.
Can I apply cuticle oil after Builder Gel?
Yes. Once the manicure has been fully completed according to the product instructions, cuticle oil can be used as part of regular aftercare. There is no need to avoid normal moisturising as a general rule.
What should I do if Builder Gel starts peeling?
Don't pull or peel it away. Follow the appropriate removal guidance for your specific Builder Gel formulation, or seek help from a qualified nail professional.
Better Builder Gel Results Start With Good Technique
A successful Builder Gel manicure isn't simply about applying more product or using a stronger lamp. It's about careful preparation, the correct products, controlled application, proper curing and sensible aftercare.
If you're experiencing lifting or uneven results, review the steps in this guide and watch the application tutorial before your next manicure.
To get started, explore the 14 Day Mani Builder Gel collection or the Perfect Prep Primer and Builder Gel Duo.
For help choosing between different gel products, read our Builder Gel vs Gel Polish comparison guide.
The best results come from using the right system, following its instructions and protecting your natural nails throughout the process.