Shop award-winning nail products






How To Apply Gentle Gels™ Polish At-Home In 6 Simple Steps

Applying gel polish at home is easier than you might think. With the right preparation, thin layers and correct curing times, you can achieve a salon-quality manicure that lasts 14 days or more. Whether you've just received your first 14 Day Mani At-Home Gel Polish Kit or you're looking to improve your technique, this step-by-step guide will show you exactly how to apply your Gentle Gels™ for the best possible results.
By following these six simple steps, you'll create a durable, glossy finish while helping to prevent lifting, peeling and chipping.
What You'll Need Before You Start
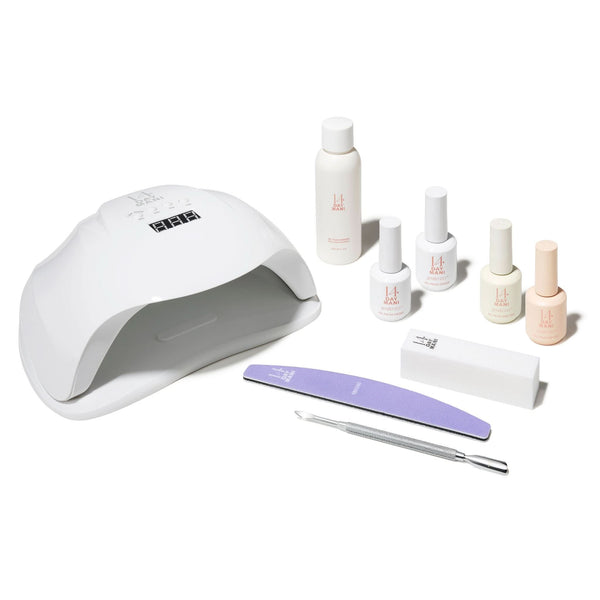
Before applying your gel polish, make sure you have everything ready. Your basic gel manicure routine includes:
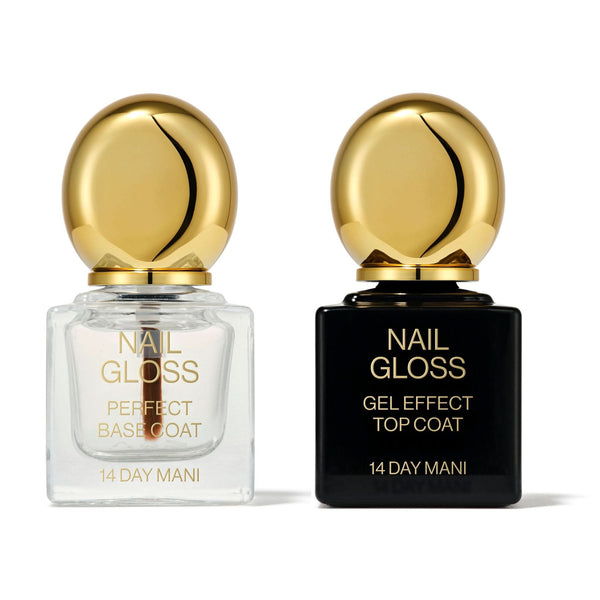
- Gentle Gels™ Base Coat
- Gentle Gels™ Colour
- Gentle Gels™ Top Coat
- UV/LED Nail Lamp
- Steel Cuticle Pusher
- Nail File
- Nail Buffer
- Perfect Prep Primer or acetone
Each of these items are included in our At-Home Starter Kit which has everything you need for a salon-quality manicure at home. Having everything prepared before you begin makes the application process much smoother.
Why Proper Preparation Matters
One of the biggest reasons gel polish lifts or peels early is inadequate nail preparation. Removing oils, gently preparing the nail plate and applying thin layers all help your gel polish adhere properly and achieve the long-lasting finish it's designed for.
Taking a few extra minutes at the beginning can add days to the life of your manicure.
How to Apply Gel Polish in Six Steps
Step 1: Prepare Your Cuticles
Healthy nail preparation starts with your cuticles. Using your Steel Cuticle Pusher:
- Gently push back the cuticles.
- Remove any excess skin from the nail plate.
- Ensure the entire nail surface is clean and clear.
Avoid applying cuticle oil before your manicure, as oils can reduce adhesion and shorten the lifespan of your gel polish.

Step 2: Shape and Buff Your Nails
Next, shape your nails using the nail file. Once you're happy with the shape, use the white buffer to lightly buff the nail surface. The aim is simply to remove the natural shine - not to aggressively file the nail. Lightly etching the nail plate creates a slightly textured surface that allows the gel polish to bond more effectively. Contrary to popular belief, gentle buffing does not damage healthy nails when performed correctly. Damage happens when nails are overfiled.

Step 3: Prime the Nail Plate
After filing and buffing, remove any remaining dust before applying your gel products. You can do this by:
- Wiping each nail with acetone on a lint-free cotton pad, or
- Applying Perfect Prep Primer.
This removes moisture and oils from the nail plate, creating the ideal foundation for long-lasting wear.

Step 4: Apply Your Base Coat
Apply a thin, even layer of Gentle Gels™ Base Coat. Be sure to:
- Cover the entire nail evenly.
- Cap the free edge by lightly brushing across the tip of the nail.
Cure under your UV/LED lamp for 60 seconds. The base coat provides the foundation that helps your colour adhere while protecting the natural nail.

Step 5: Apply Your Gel Colour
Apply your first thin coat of Gentle Gels™ colour. Cure for 60 seconds under your UV/LED lamp. Repeat with a second thin coat and cure for another 60 seconds.
If you're using one of the more pigmented gel shades or have accidentally applied slightly heavier coats, increase your curing time to 90 seconds. Don't worry if the colour still feels slightly tacky after curing. This is completely normal and simply means the inhibition layer is still present. The tackiness disappears after applying and curing your top coat.

Step 6: Seal with Top Coat
Finish your manicure by applying a thin layer of Gentle Gels™ Top Coat. Again, remember to cap the free edge before curing. Cure for 60 seconds under your UV/LED lamp.
Once your nails have cooled for a minute or two, apply the Nonicure Nail Serum to hydrate the surrounding skin and complete your manicure. Your glossy, salon-quality gel manicure is now complete.

Common Gel Polish Application Mistakes
Even small mistakes can affect how long your manicure lasts. Avoid these common issues:
- Applying Thick Layers: Thin coats cure more evenly and create a stronger, longer-lasting finish.
- Skipping Nail Prep: Proper preparation is essential for good adhesion and helps prevent lifting.
- Forgetting to Cap the Free Edge: Sealing the nail tip helps protect against everyday wear and reduces chipping.
- Getting Gel on the Skin: Keep every layer slightly away from the cuticle and sides of the nail. If gel touches the skin, remove it before curing.
- Under-Curing: Always cure each layer for the recommended time using the provided UV/LED lamp.
How to Make Your Gel Manicure Last Longer
A few simple habits can significantly extend the life of your manicure.
For the best results:
- Prepare the nail thoroughly.
- Apply thin, even coats.
- Cap the free edge with every layer.
- Cure each layer fully.
- Finish with cuticle oil after your manicure.
- Wear gloves when cleaning or using harsh chemicals.
These small steps help maintain a glossy, chip-resistant finish for up to 14 days or longer.
Frequently Asked Questions
How many coats of gel polish should I apply?
For most shades, two thin colour coats provide full coverage. Very sheer shades may require an additional thin coat.
Why does my gel polish feel sticky after curing?
The sticky layer is completely normal. It disappears once your top coat has been applied and fully cured. This is called the inhibition layer and it's there to helpe each layer adhere properly.
How long should I cure each layer?
Base coat, colour coats and top coat should generally be cured for 60 seconds under a compatible UV/LED lamp. If you've applied thicker layers, cure for up to 90 seconds.
Do I need to buff my nails before gel polish?
Yes. Lightly buffing removes surface shine and improves adhesion without damaging the natural nail when done correctly. Gel won't stick to a shiny nail bed.
Why does my gel polish peel after a few days?
Peeling is usually caused by insufficient nail preparation, thick product application, failing to cap the free edge or under-curing.
Enjoy Salon-Quality Gel Nails at Home
Creating a long-lasting gel manicure at home doesn't require professional experience - it simply requires the right technique.
By following these six easy steps, preparing your nails properly and applying thin, carefully cured layers, you'll enjoy beautiful, glossy nails that last for weeks.
Whether you're applying your very first set or perfecting your routine, the Gentle Gels™ system has been designed to make salon-quality results achievable from the comfort of your own home.