Shop award-winning nail products




How To Apply Hema-Free Builder Gel In 6 Easy Steps

If you're wondering how to apply builder gel at home, the process is simpler than you might think. With the right products and technique, you can achieve strong, salon-quality nails in just six easy steps. Our HEMA-free Builder Gel At-Home Kit is designed to make application straightforward, even for beginners, while delivering durable, long-lasting results.
Whether you're strengthening natural nails, creating a smooth overlay or looking for a safer alternative to traditional builder gels, this guide explains everything you need to know.
Why Choose HEMA-Free Builder Gel?
Builder gel has become one of the most popular products for creating stronger, healthier-looking nails. However, many traditional formulas contain HEMA, an ingredient that can cause skin irritation or allergic reactions in some users.
Our HEMA-free Builder Gel offers the same professional-strength durability without HEMA, making it a great option for anyone looking for a gentler system that is also suitable for at-home use.
Benefits include:
- Strong, durable nail overlays
- Flexible finish that helps reduce breakage
- Self-levelling formula for smoother application
- Suitable for beginners and professionals
- Available in a range of natural builder gel shades
- Designed for use with our simplified primer system
The 14 Day Mani Builder Gel System
Unlike many builder gel systems, ours has been designed to simplify the process.
Using our Perfect Prep Primer alongside our HEMA-free Builder Gel removes the need for a separate base coat. This saves time while still creating excellent adhesion between the natural nail and the builder gel.
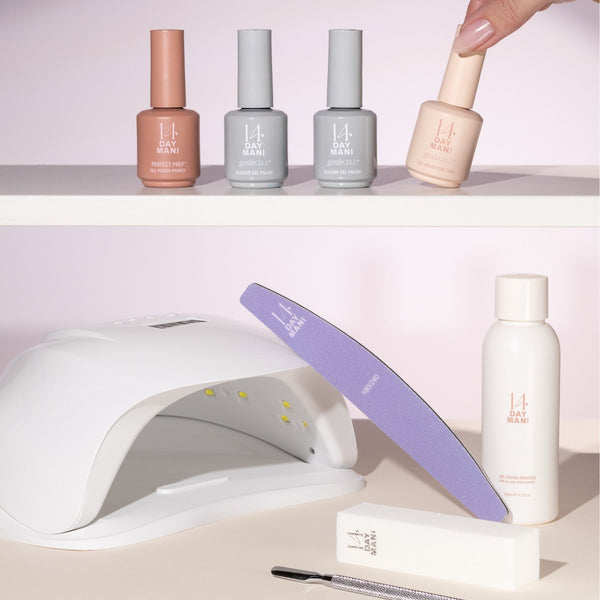
To complete your application, you'll simply need:
- Perfect Prep Primer
- Your chosen Builder Gel shade
- HEMA-free Top Coat
- UV/LED Nail Lamp
How to Apply Builder Gel in Six Easy Steps
Step 1: Prepare Your Nails
Proper preparation is one of the biggest factors in achieving long-lasting builder gel nails. Start by washing and drying your hands thoroughly.
Next:
- Gently push back the cuticles using a steel cuticle pusher.
- Remove any shine from the nail plate using the buffer provided
- Lightly etch the surface of each nail to improve adhesion.
- Remove any dust before continuing.
Taking time with nail prep helps reduce lifting and improves wear time.
Step 2: Apply Perfect Prep Primer
Once your nails are prepared, apply a thin, even layer of Perfect Prep Primer to each nail. Allow it to air dry for a few seconds.
This primer acts as both a dehydrator and adhesion layer, eliminating the need for a separate base coat while helping your builder gel bond securely to the natural nail.
Step 3: Apply the Builder Gel
Now it's time to build strength. Begin by applying a very thin slip layer of Builder Gel across the entire nail. Do not cure this layer.
Next:
- Pick up a small bead of Builder Gel.
- Place it near the centre of the nail.
- Gently guide the gel towards the cuticle and sidewalls.
- Allow the self-levelling formula to do most of the work.
- Cap the free edge to improve durability.
Avoid overworking the gel, as excessive brushing can interfere with the self-levelling effect.
Once satisfied with the shape:
- Cure for 60 seconds under a UV/LED lamp.
- If you're new to builder gel or have applied a thicker layer, cure for 90 seconds instead.
Step 4: Shape and Refine
After curing, inspect each nail.
Use a nail file to refine:
- Sidewalls
- Free edge
- Overall nail shape
If your builder gel has self-levelled well, only minimal filing should be needed. Remove any filing dust before moving on.
Step 5: Apply Top Coat
Seal your finished builder gel with a thin layer of HEMA-free Top Coat. This protects the builder gel while adding a beautiful glossy finish. Cure under your UV/LED lamp for 60–90 seconds.
Step 6: Hydrate Your Cuticles
Once curing is complete, allow your nails to cool for around one minute. Finish by applying our Nonicure Nail Serum around each nail. Hydrating the surrounding skin helps maintain healthy nails and gives your manicure a professional finish.
Common Builder Gel Mistakes to Avoid
Even with beginner-friendly products, a few common mistakes can reduce the lifespan of your manicure.
Skipping Nail Preparation
Builder gel adheres best to a properly prepared nail plate. Failing to remove shine or oils can lead to premature lifting.
Applying Thick Layers
Thicker isn't always better. Applying excessively thick layers makes the gel harder to cure evenly and can affect the finished shape.
Flooding the Cuticles
Keep product away from the skin surrounding the nail. Builder gel touching the cuticle area can increase the chance of lifting.
Overworking Self-Levelling Gel
Our Builder Gel is designed to self-level naturally. Once you've guided the bead into place, allow the product to settle instead of repeatedly brushing it.
Not Curing Long Enough
Always follow the recommended curing times, especially if you've applied a slightly thicker overlay.
Which Builder Gel Shade Should You Choose?
Our Builder Gel collection includes a range of shades suitable for different styles and preferences. Natural pinks are ideal for everyday wear, while neutral and nude shades create a clean salon finish that's perfect on its own or underneath gel polish.
Whichever shade you choose, every formula offers the same HEMA-free performance and self-levelling consistency.
Why Our Builder Gel Is Perfect for Beginners
Many builder gel systems can feel intimidating for first-time users. Our simplified three-product system makes application much easier by removing unnecessary steps while still delivering professional-looking results.
With:
- No separate base coat required
- Self-levelling consistency
- HEMA-free formula
- Easy six-step process
It's ideal for anyone looking to achieve stronger nails from home.
Frequently Asked Questions
Can beginners apply builder gel?
Yes. Our HEMA-free Builder Gel is specifically designed to be suitable for at-home users as well as professional nail technicians.
Do I need a base coat with this Builder Gel?
No. Our Perfect Prep Primer replaces the traditional base coat, simplifying the application process.
How long does builder gel last?
With correct preparation and application, builder gel can provide long-lasting wear before needing maintenance.
Can builder gel strengthen natural nails?
Builder gel creates a protective overlay that helps reinforce natural nails and reduce everyday breakage.
How long should I cure builder gel?
Cure each builder gel layer for 60 seconds under a compatible UV/LED lamp. For thicker applications or first-time users, curing for 90 seconds is recommended.
Why is my builder gel lifting?
The most common causes include insufficient nail preparation, product touching the cuticles, or under-curing.
Achieve Stronger Nails in Just Six Steps
Applying builder gel doesn't have to be complicated. With proper preparation, our simplified HEMA-free Builder Gel system and the right curing technique, you can achieve beautiful, durable nails from the comfort of your own home.
Using Perfect Prep Primer together with your favourite HEMA-free Builder Gel shade creates a streamlined routine that delivers professional-looking results while keeping application simple enough for beginners.