NEW IN: NAIL GLOSS SPF 50 Base & TOP COAT - UV PROTECTION FOR NAILS - SHOP NOW


Nail Art Tutorial: Plaid Nails

A trending twist for your fingertips - this plaid nail art is everywhere right now. And we can see why. It's on trend, beginner friendly, and a standout look.
What You’ll Need:
- A strong colour for your base - we used our Gentle Gels™ polish in shade Mocha
- A pop of colour for the line details - we used our Gentle Gels™ polish in shade Blue Dreams
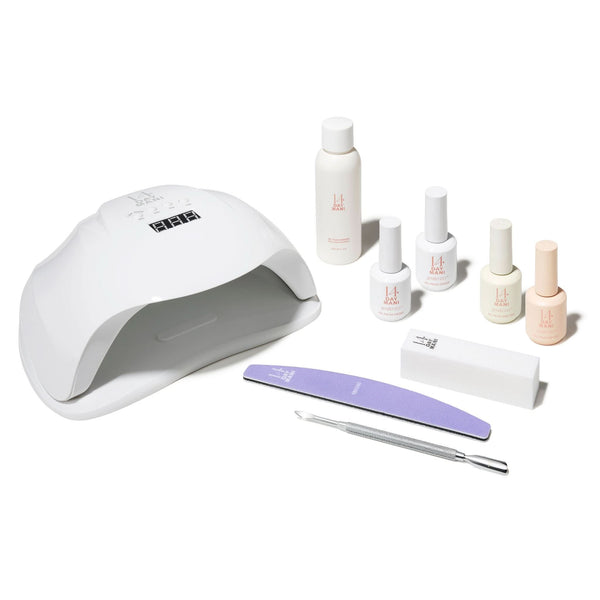
- 14 Day Mani Gel Polish Starter Kit (includes LED lamp, base + top coat, and everything else you need)
How To:
1. Start with a solid base:
Prep your nails - gently buff away the shine, tidy up your cuticles, and apply our Perfect Prep Primer followed by Base Coat.
Cure for 60 seconds under the LED lamp.
2. Apply your base colour:
We used Mocha for that rich, warm brown - perfect against the cooler contrast of the plaid. Cure each coat for 60 seconds.
3. Add your vertical stripes:
Using a fine liner brush and a steady hand, paint two thin vertical lines in blue & cure. The trick here is to go very slowly. It doesn't have to be perfect from the start as you can tidy it up and add more layers.
4. Now the horizontal:
Repeat the same with two thin horizontal blue lines to form the plaid grid.
If you want, using black gel polish in shade Black Paint, you can add one vertical and one horizontal line to give it that layered depth. Cure again.
5. Seal it in:
Finish with a glossy Top Coat and cure for a final 60 seconds. You're done!
The best part? Depending on the season you could choose any colour combo you want. From deep, cosy browns to bright pops of pink. Our new favourite nail look!
Want an easy follow along video tutorial for this look? Check out the video on our Instagram!
